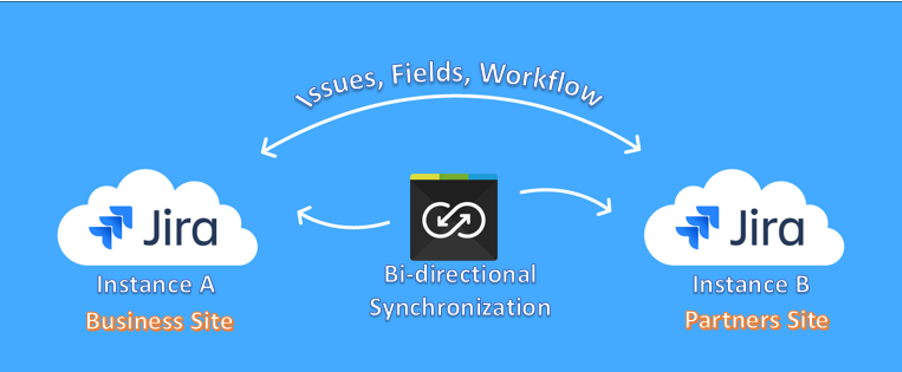
Most of us are aware that Jira is a highly regarded application lifecycle management tool. One of its main features is team collaboration. Sometimes, however, collaboration between a business team and its partners can pose a challenge due to their network restrictions.
In this article, we will see how this problem can be addressed and the available options.
Jira Business Case
As an external partner, we supported an embedded system customer who already was using Jira for its internal users. During that time, the customer had tight security measures in place and its IT team was unable to grant us access to its systems and tools; instead, we had to use a customer-provided laptop with VPN connectivity. This setup wasn’t efficient and led to more investment and procedures to follow when a new external user needed access, so we set out to find an alternative solution to run the business more effectively with good collaboration with everyone through the Jira portal.
Many vendors have addressed this problem with automatic synchronization as a Jira plugin.
Some of those plugins are:
- Backbone Issue Sync.
- Exalate Jira Issue Sync.
- Issue sync – Integration for Jira.
This article takes a look at Backbone Issue Sync and how the synchronization of Jira projects can be done between two instances.
Backbone Issue Sync
Backbone Issue Sync helps users synchronize Jira projects, enabling collaboration across departmental and B2B borders. Its setup and configuration are very simple compared to other plugins.
Backbone Issue Sync is a paid plugin developed by the K15t Group. It is available in the Atlassian marketplace.
This plugin supports the following Jira versions:
- Jira Cloud.
- Jira Server from 6.2–8.6.1.
- Jira Data Center 6.3–8.6.1.
Key Features:
- Automatic bi-directional issue synchronization between Jira projects.
- Control issue, comment, field and attachment mapping.
- Map workflows.
- Uses JQL to define issue syncing, filters and limits.
- Sync comments and attachments.
- Defining workflow mapping and specifying distributed responsibilities.
- Simple setup, configuration and admin UI.
- Performance, reliability and scalability proven by enterprise installations.
- Full privacy and security control.
- Synchronization of data via HTTP(S), file and email.
- In-product troubleshooting support available.
- Partners/vendors can sync unlimited projects and issues.
Let’s consider we have a business team and external partner where they want to work together in a Jira issues on daily basis but they have a network restriction between each team.
In this case, we need to set up a separate Jira instance and create a project with the same name on both sides.
Prerequisites:
- Install Jira on both sides.
- Create a Jira project with the same name in both Jira instances.
- Create a Jira user named “syncuser” on both instances.
- Grant “syncuser” Jira permission to Browse Projects, Create Issues and Edit Issues.

Establish a Connection Between the Projects
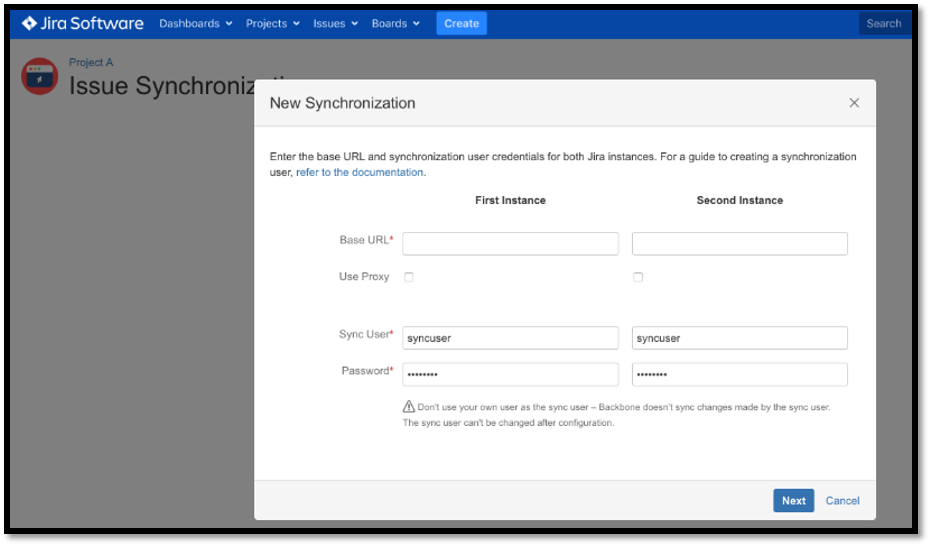
- Open the Jira Project in the first Instance, then select Project Settings > Issue Synchronization > New Synchronization. To make things simple, select Centralized Configuration (this is Backbone’s ‘default’ synchronization type and is recommended for most use cases).
- Set up the synchronization:

- Enter the base URL of your Jira in the first Instance and the base URL of the external partner’s Jira URL in the second Instance.
- In the Sync User field, enter the synchronization user’s username (in this example, that’s syncuser).
- In the Password field, enter the synchronization user’s password.
- On the next screen, select which project you want to synchronize with. Select the same project name in both instances.
- Next, assign the synchronization a name and description. When you create multiple synchronizations for a Jira project, descriptive naming is important to avoid confusion. For now, we will go with default values.
We have established the connection between Jira projects of two different instances. Now, let’s configure what are all the data will be synchronized between the projects of each instance.
Configure Synchronization Settings
- In the below step, we’ll configure the synchronization data, telling Backbone what data it should synchronize between the projects of two instances.
- Click … > Configure to go to the configuration UI:

- Click the Edit Configuration button to start configuring.
- On the Issue Types tab, click Start with simple mappings and select an issue type to synchronize in both directions between two instances of Jira projects.

- Now, map which fields should be synchronized at Fields – Mappings > Start with simple mappings.
- Enable the checkbox for Summary and Description field and click Create.
- Click the Publish Draft button to save the configuration, then select Start to start the synchronization.
Synchronization with Backbone Issue Sync is now configured.
Let’s verify the synchronization:
- Create a new issue with type Task in the first instance and enter some content in the Summary and Description fields.
- Open the Jira Project in the second instance: You should see that the issue has been synchronized.
- Open the synchronized issue and edit the summary and description in the second instance.
- Go back to the issue in the first instance: You should see the edits have been synchronized.
Conclusion
Backbone Issue Sync helps overcome the challenge of collaboration between a customer and external partners over a restricted security network. Using this plugin, many highly secured business teams are able to collaborate effectively without issue.


