With the introduction of the Pipeline, Jenkins added an embedded Groovy engine, making Groovy the scripting language in the Pipeline’s DSL.
Here are the steps you need to take to set up a Jenkins Pipeline.
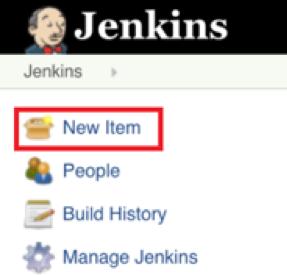
- First, log on to your Jenkins server and select “New Item” from the left panel:
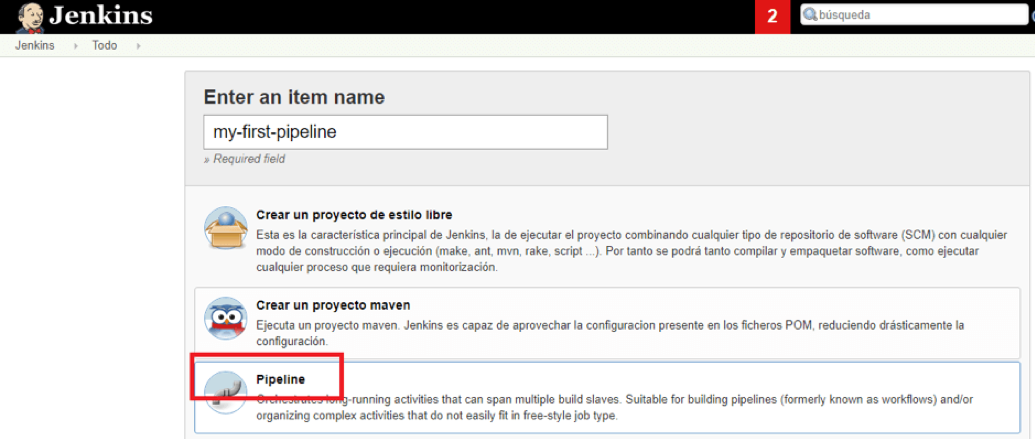
- Next, enter a name for your pipeline and select “Pipeline” from the options. Click “Ok” to proceed to the next step:
- You can now start working your Pipeline script:

The red box in the middle is where you can start writing your script.
Creating the Jenkins Pipeline Script
Pipelines has specific sentences or elements to define script sections, which follow the Groovy syntax.
Node Blocks
The first block to be defined is the “node”:

A “node” is part of the Jenkins distributed mode architecture, where the workload can be delegated to multiple “agent” nodes.
A “master” node handles all the tasks in your environment. Jenkins agent nodes offloads builds from the master node, thus performing all the pipeline work specified in the node block. For more details, read about Jenkins Distributed builds.
- This block is optional, and one could be considered as good practice, since with the code included in this block.
- Jenkins will schedule and run all the steps once any node is available and creates a specific workspace directory.
Stage Section in Jenkins Pipeline Build
The “stage” section is required to segregate the work category as listed inline:

A specified pipeline will consist of several steps that can be grouped in several stages. For example:
| Stage 1 | Pull code from repository | Pull Code CheckIn |
| Stage 2 | Build your project and artifacts | Build Project/Artifacts of Project |
| Stage 3 | Deploy your application | Deploy from centralized repo to specified environment |
| Stage 4 | Perform functional tests | QA performance will happen |
| Stage 5 | Perform performance tests | · (UI and performance can test. |
Note: Each of the these can include more than one action.
For example, a stage to deploy your application can consist of copying the files to a defined environment for functional tests and to a dedicated server for performance tests/QA and once files are copied successfully, delivery process will start to deploy on any specified environment.
Each stage block specifies the tasks to be performed:

Stage blocks are also optional, but they are recommended because they provide an organized way of specifying tasks to be executed in the script.
Pipeline Syntax
This section builds on the information introduced in Getting started with Pipeline and should be treated solely as a reference. For more information on how to use Pipeline syntax in practical examples, refer to the Using a Jenkinsfile section of Jenkins chapter.
- As of version 2.5 of the Pipeline plugin, Pipeline supports two discrete syntaxes, which are detailed below. For the pros and cons of each, see the Syntax Comparison.
“Pipeline Syntax” to access the following page:
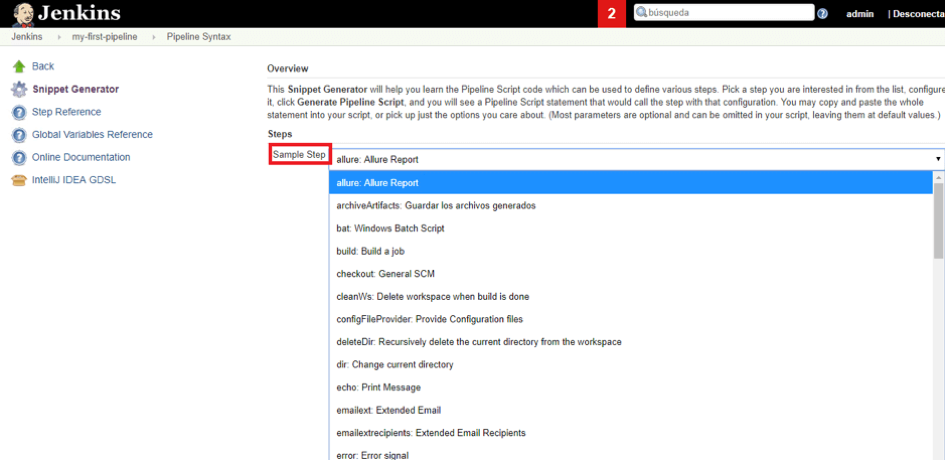
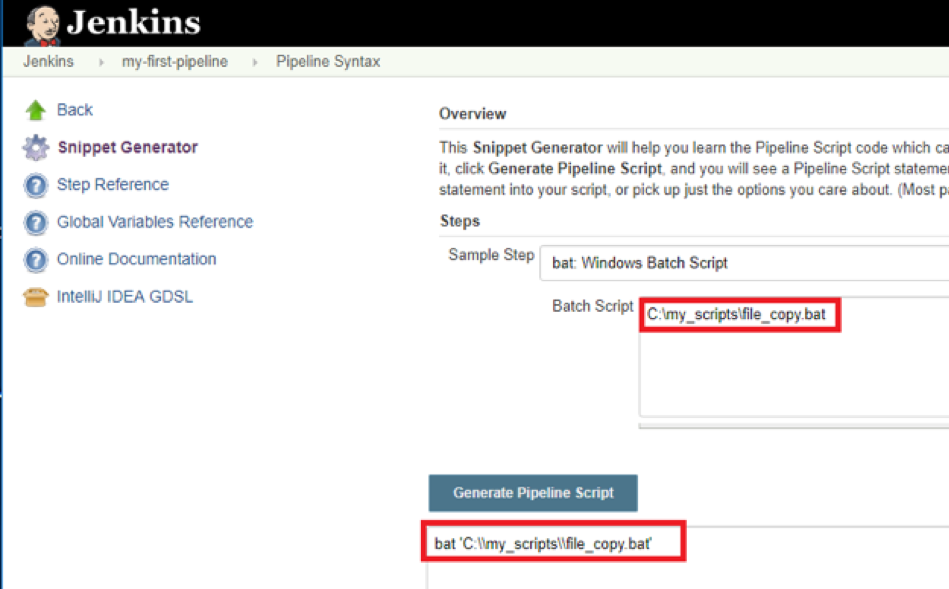
“Generate Pipeline Script” will create the desired sentence that can be added to your script immediately.
The Jenkinsfile
Pipeline supports two syntaxes, Declarative (introduced in Pipeline 2.5) and Scripted Pipeline. Both of which support building continuous delivery pipelines. Both may be used to define a Pipeline in either the web UI or with a Jenkinsfile, though it’s generally considered a best practice to create a Jenkinsfile and check the file into the source control repository

Jenkins Scripted Pipeline:
- For more advanced usage with Scripted Pipeline, the example above node is a crucial first step, as it allocates an executor and workspace for the Pipeline. Since the Jenkinsfile is being pulled directly from source control, Pipeline provides a quick and easy way to access the right revision of the source code:
 The checkoutstep will checkout code from source control; scm is a special variable which instructs the checkout step to clone the specific revision which triggered this Pipeline run.
Sandbox Security in Jenkins
Jenkins limits the execution of any Groovy script by providing a sandbox. The option “Use Groovy Sandbox,” shown below, is available in the Pipeline tab, and it allows the scripts to be run by any user without requiring administrator privileges. In this case, the script is run only by using the internal accessible APIs (which allow you to develop your script by using Groovy).
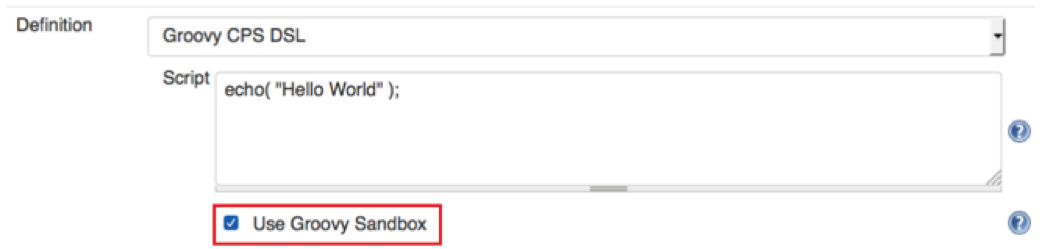
When unchecked, if the script has operations that require approval, an administrator will have to provide them. This method is known as “Script approval.” By default, all Jenkins pipelines run in a Groovy sandbox.
If the option is checked and unauthorized operations are used, the script will fail when run. Both the whitelist and the blacklist of functions can be checked at Script Security’s built-in list.
