Many organizations use a combination of open so Many organizations use a combination of open source and commercial tools and Azure DevOps (formerly called VSTS) and an application lifecycle management (ALM) tool that includes features such as Azure pipelines. This article talks about how to achieve an end-to-end DevOps setup in Azure
Pre-requisites:
- Subscription
- Project created with version control selected
- Process template selected (Agile/Scrum)
- Code repo–one on VSTS and one on GitHub/cloud GitLab
- Build server–Use credits from MSDN subscription
- Deploy–Azure subscription from MSDN
- Other tools–tools supported by VSTS/Azure DevOps
- The objective of a pre-commit job is to reduce the risk of complexities, duplications and potential bugs in the code to get deployed directly into production.
- In usual workflows, the build will be generated on regular intervals and released for testing. However, there is a chance of several code quality issues and building deployment issues.
- With the help of pre-commit job, we can configure triggers to generate builds for every pull request made by developers. Also, this enables the development team to create pull request releases that deploy your pull request code or pull request builds, which help to detect deployment/release issues before the code changes are merged.
- Pre-commit deployments also help catch deployment/release issues early in the cycle, maintain better code quality and release with higher confidence.
Configuring Agile Board in Azure DevOps for Project Management, and Tracking Steps to Do It
Steps:
With Azure Boards we can plan, track and discuss work across different teams. With Azure Boards, we can swiftly and simply start tracking tasks, features and bugs of our project.
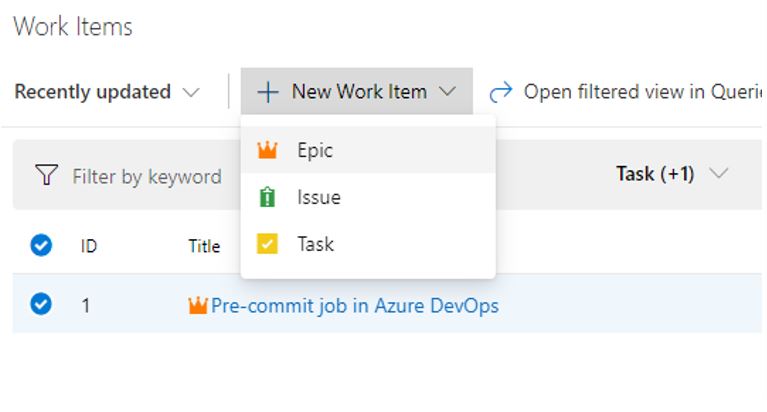
For every project we have to create on sprint, go to Boards and select Work Items to create a new user story and provide the acceptance criteria. Select Boards and create New Work Items, then under Epic select User Story and click on Task and provide the task description.
Setting Up Branches, Version Control and Branch Policies
Steps:
- Import the code from VCS.
- Under Repos, create branches such as dev or test.
- Set up the branches policies to improve code quality.
Improve Code Quality With Branch Policies
Branch policies help teams protect their important branches of development. Branch policies enforce a team’s change management standards and code quality.
Setting up Branch Policies for Review Code
Code reviews are good practice for the most successful software development projects. We have to configure the minimum number of reviewers to review the code and complete the pull request.
- The code review done in a pull request is simply to find obvious bugs.
- Code reviews help protect the team from bad commits or merges and broken builds that hinder team’s productivity.
The review will help to catch these kind of problems before the merge, protecting our important branches, such as the release branch, from undesirable changes.

Pre-Commit, Enabling Pull Request
Steps:
Workflow to complete the pull request:
- Create a pull request
- Complete a pull request
Benefits of pull request:
- Peer review
- Enough testing and better stability
- Reducing conflicts
- Continuous delivery
- Clearer responsibility
Create a pull request:
- Pull requests combine the review and merge the code into a single collaborative process.
- For every bug fix or new feature in a branch, we have to create a new pull request.
- Add the members of the team to the pull request once the development branch build is completed without issues. Then members can review and vote on your changes.
Link work items to your pull request:
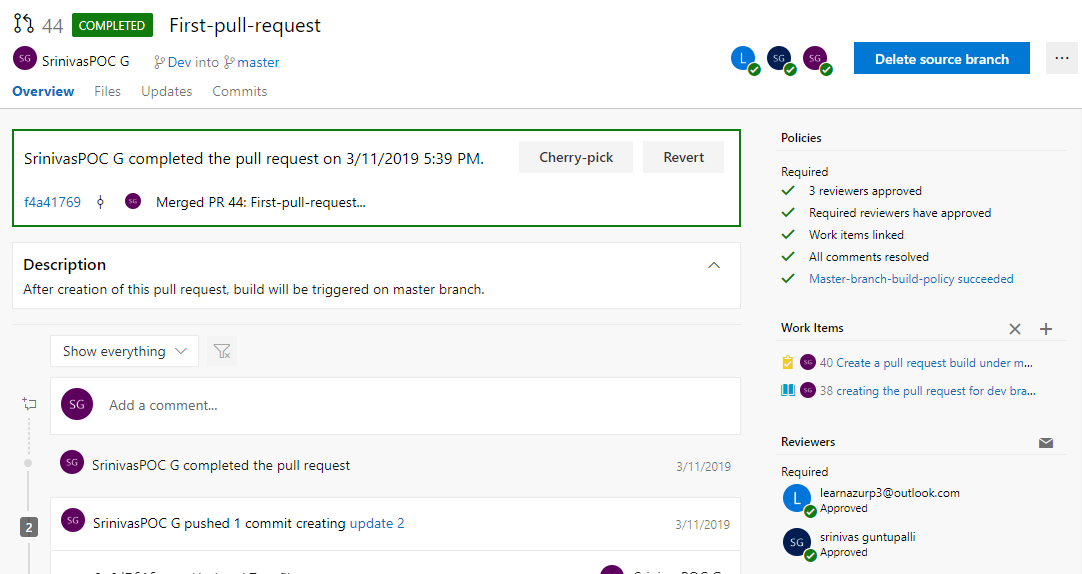
Select the Overview tab in Azure DevOps. Select the add link button “+” in the Work Items to relate your current pull request.
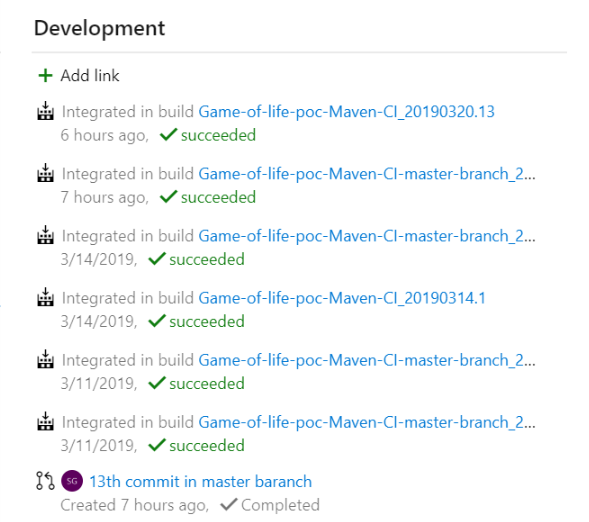
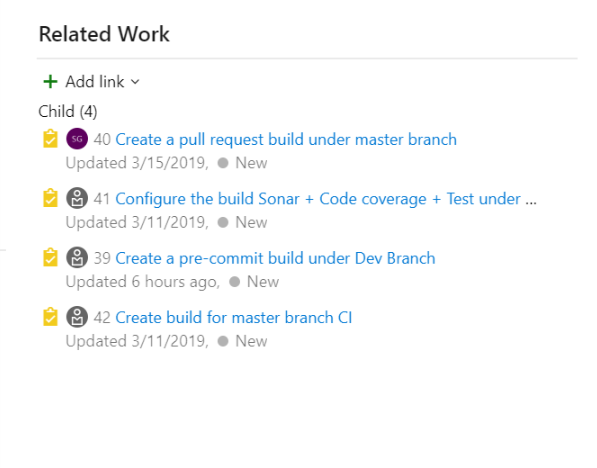
Complete Pull Request:
- The basic policy requires that some reviewers approve the code with no rejections.
- If Allow users to approve their own changes is not selected, the creator of the pull request can still vote Approve on their pull request, but their vote won’t count toward the Require, least reviewers policy.
- If any reviewer rejects the changes, the pull request cannot be completed unless the allow users selection is completed, even if some reviewers select Waiting or Reject.
- To reset code reviewer votes when new changes are pushed to the source branch, check Reset code reviewer votes when there are new changes.
Nightly CI Build
Steps:
Build Triggers:
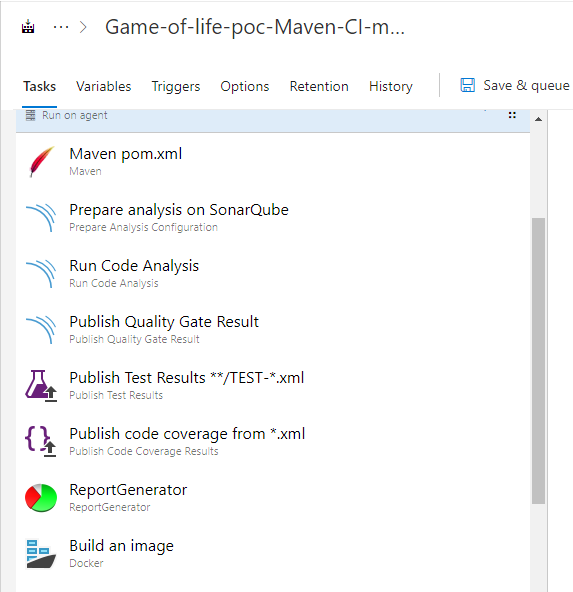
- We can configure the build triggers to generate war package for every code commit made to the branch.
- Under Build select Triggers to enable CI and include master branch.
- One can enable the build trigger for every commit made to the branch.


- Configure two builds—one for dev branch and one for master branch.
- If the developer executes the code, the dev branch build is triggered automatically with help of dev branch polices.
- Once the dev branch build is completed, reviewers approve the pull request and the master branch build is triggered. Once the build is completed, it moves to the release part.
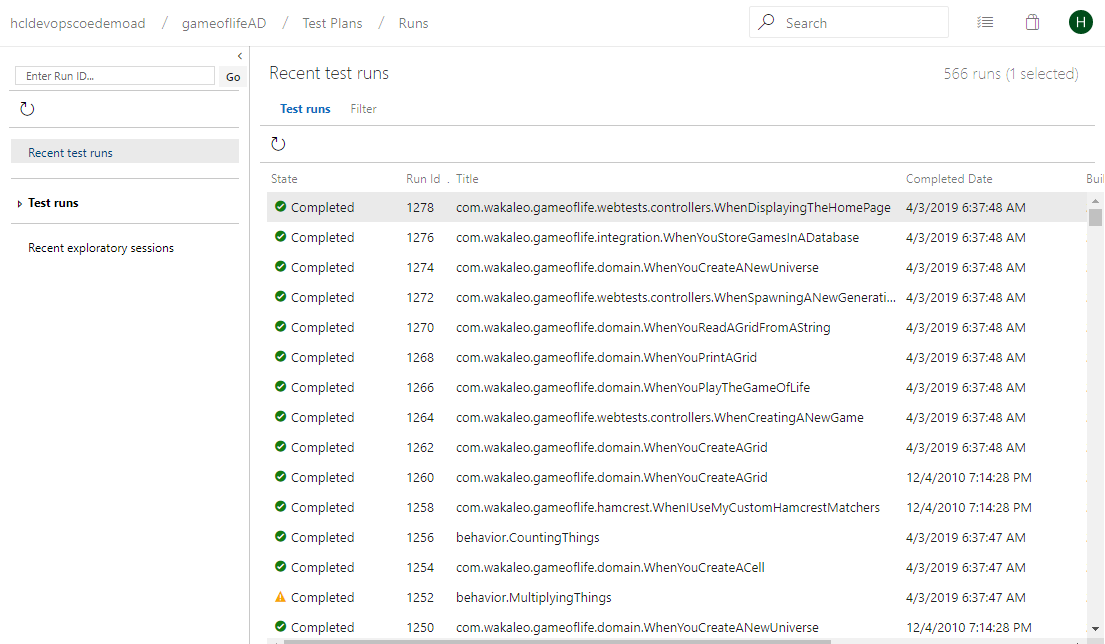
- The code quality analysis and unit test/Junit test is configured in the dev branch. The code quality gateways such as code review and find bug have been enabled.
Continuous Deployment (Release) through Azure Kubernetes Services (AKS)
Pre-requisites:
- Any source code management tool such as Git/SVN or Azure Repo
- Microsoft MSDN account
- Azure account creation and VSTS/Azure DevOps account creation
- Dockerfile to be created and placed along with source code in Git
- YAML file to be created and placed along with source code in Git
- Kubernetes cluster to be created in Azure portal
- Docker hub account or Azure Container Registry
- Build definition–Docker build image
Docker File Creation for Application to Deploy
Create the Service Principle to provide the access to the application/Docker image to deploy on Azure Kubernetes services. Select the Deploy to Kubernetes task and make the following configurations:
- Create new Kubernetes service connection
- Select the command option for deployment
- Provide the configuration file location i.e, Deployment.yaml
- Select the container registry type
- Select the subscription
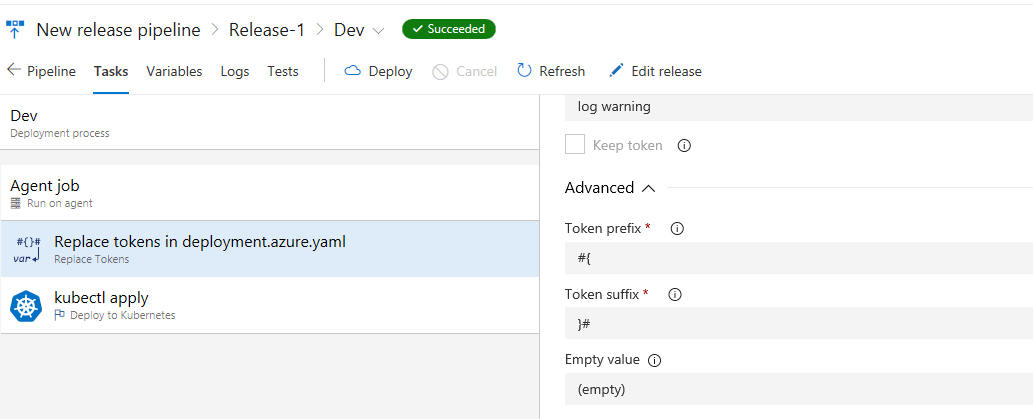
- Select the Replace Tokens task to append the tag number for an image automatically while pushing it to container registry
- Perform the deployment and view the logs

Test plans:
Load testing:
Pipeline History
Azure Pipelines is used to automatically build and test your code project and make it available to other users. Azure Pipelines integrates CI and CD to continuously test and build your project and ship it to any target server. It provides the full-stack end-to-end flow of CI and CD through various tools integrated as tasks in Azure DevOps.
Conclusion
With Azure DevOps, you can set up end-to-end DevOps with tracebility, pre-commit, CI and deployment to Kubernetes.

This article was co-authored by Srinivasa Rao Guntupalli, lead engineer at HCL Technologies Ltd. He works on various DevOps technologies such as Git, maven, Jenkins and cloud technologies including AWS, Azure, Azure DevOps/VSTS.


